Everyone who owns a home draft system has to deal with placing CO2 lines. Whether you own a home bar, a soda fountain, or a portable draft system, you will have to tangle with these plastic hoses. Many people just buy a big roll of tubing and slap their gas lines together, which is not necessarily the smartest way to go about installing your CO2 lines. By thinking ahead, you can save yourself a little money and ensure that your beverage turns out to be perfectly carbonated.
First, you should gather together the appropriate tools for the job. These include:
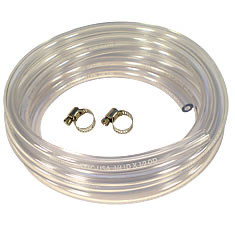
- some sharp scissors, clippers, or a utility knife
- hose clamps, preferably of the screw tight variety
- an appropriate screwdriver for the hose clamps you've selected or a pair of needle nose pliers for pressure clamps.
- a tape measure
- paper and pencil
We are assuming a D.I.Y. approach to installing your CO2 lines, for those who are buying parts and starting from scratch. Kits are available, and the advice contained herein is adaptable to kit installations as well.
Before you even buy your tubing, you should look at your bar installation. The first task before you is to draw out a diagram of where your CO2 lines and beverage lines should be placed. Determine how many different pressures you wish to output from your CO2 tank regulators, and keep this in mind as you design your regulator rack. Modular units are available if you plan on having differing pressures going out to your beverage tanks.
Next, take the tape measure, paper, and pencil, and mark down the length between your regulator or regulator rack and the tanks. If you plan on keeping your gas chilled, the distance between your regulator and kegs should be minimal, but always give your self some extra room (i.e. tubing length) to maneuver. This will help in the long run. If you plan on keeping your CO2 tank outside your kegerator, you will need some specialty supplies to be able to mount the CO2 line into the kegerator unit. Specifically, you will need an extra mounting shank with line ends on both sides.
Mounting the CO2 line through the door is usually the safest bet, because 99% of refrigerators have no cooling lines in the door. If you have a freezer conversion kegerator, you can also build the CO2 inlet into a collar that goes in between the cover door and the freezer unit. If you find this method of mounting unsightly, you can always mount the CO2 shank through the side or back of the unit, but be careful! This is where you run into problems with coolant lines. You will need to take the panels off of the refrigeration unit until you can actually see the coolant lines. If you cannot see the lines, you run the risk of drilling through them and ruining your refrigeration unit.
At this time, you should consider whether or not you want to invest in an inline CO2 gas filter. Some home bar owners are using these new items to ensure that no off-tastes will interfere with their beer experience, based on reports that un-sanitized CO2 tanks can cause adverse effects in the taste of draft beers.
Once you have thought out your plan thoroughly, you should add up the length of tubing you need and acquire it. When cutting tubing and fitting it to the line ends, make sure that your hose clamps are secure. The proper way of tightening a hose clamp is to tighten it until the plastic is slightly bulging through the slots in the metal strap. If you tighten it too much, it will cut through the tubing slightly, thereby weakening it. The high pressure CO2 used in home draft systems is potentially dangerous, and gas line installations should be double checked before "firing it up".
This simple advice should help the beginner to install CO2 lines at home. Good luck!

Komos
 Summit
 Beverage-Air
 DCS
DCS
 Marvel
 Perlick
 Bull
Bull
 Avanti
 Danby
Danby
 CM Becker
 Continental
 Fagor
Fagor
 Cal Flame
 Twin Eagles
 Frigidaire
 Fire Magic
 GrowlerWerks
 Hestan
 Igloo
Igloo
 True
True
 Intertap
 Kegco
Kegco
 Keggermeister
 Koolatron
 KegLand
 Krowne
 Krups
Krups
 Lynx
Lynx
 Maxx Cold
 Micro Matic
 Midea
Midea
 Nor-Lake
 Nostalgia
 Arctic King
 Synek
Synek
 Taprite
 Turbo Air
 UBC Group
 Value Series
 Versonel
 VinoTemp
 New Leaf